You can record a call to Skype using the built-in recording features of the software. There are also some third party apps that can help you capture audio and video calls.
Recording sound or video brings in Skype has never been simpler. Before, you hosted to utilize a third-gathering program, however now Skype has a worked in recording highlight for desktop, mobile, and the web. That recording lasts in Skype for 30 days, but it can be saved as an MP4 file for future reference and sharing.
Call recording works in Skype software for Windows, macOS, Linux, iOS, and Android. It’s also supported in Skype for the web, but that version is picky about its browsers—only Google Chrome and Microsoft Edge pass muster. Some third-party tools can record VoIP (Voice over IP) calls if you prefer that route.
Whether you’re using the desktop version of Skype or Skype for the web, the process for recording and managing videos is the same. The mobile app has only minimal differences.
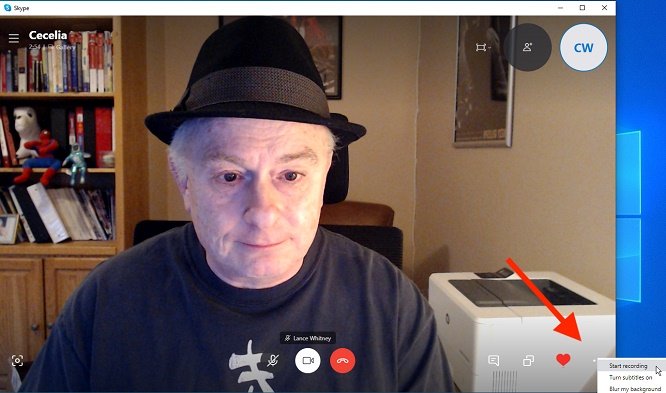
Open the Skype application on your computer or mobile device and start the audio or video call. Once connected, click the + sign (or the ellipsis icon) and select the Start recording command. A message pops up on the screen to alert you and the other person that you’re recording the call.

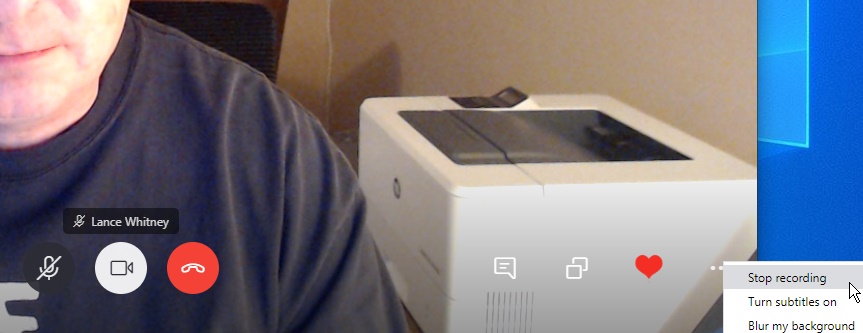
When you are ready to stop recording, click the + sign (or ellipsis icon) again and select the Stop recording command. You can also simply end the call.

After the recording has stopped, it’s stored in the Skype chat window for you and your contact.
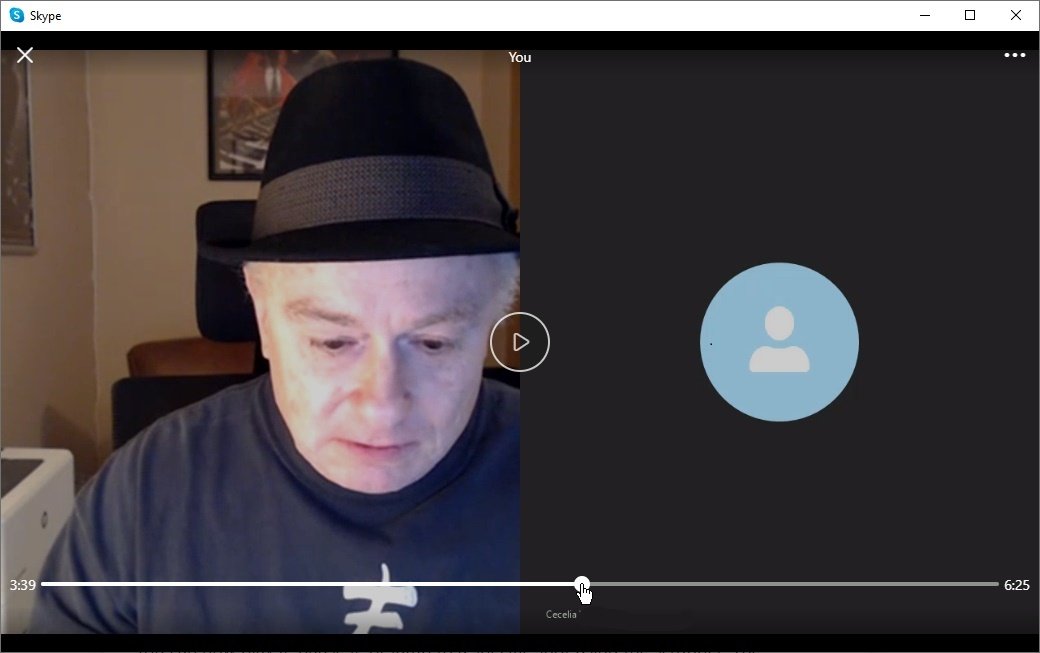
View the video by clicking the thumbnail inside the chat. You can now play it, pause it, or jump to a specific spot using the scrubber. The recording plays in its own video window.

Since the recording resides in Skype for a mere 30 days, you’ll need to save it as a file to permanently hang onto it. With the desktop version of Skype, click the three-dot icon at the upper-right of the video thumbnail for more options. Click Save to Downloads to store it in your Downloads folder. Click Save As to house it in a different location. The file is saved as an MP4 video, even if it’s an audio recording.

Once the video has been saved to the computer, you can navigate directly to its location from Skype. From inside the chat with the recorded video, click the three-dot icon next to the thumbnail and choose Show in folder. Once the window appears showing the downloaded video file, double-click the MP4 file to open it.
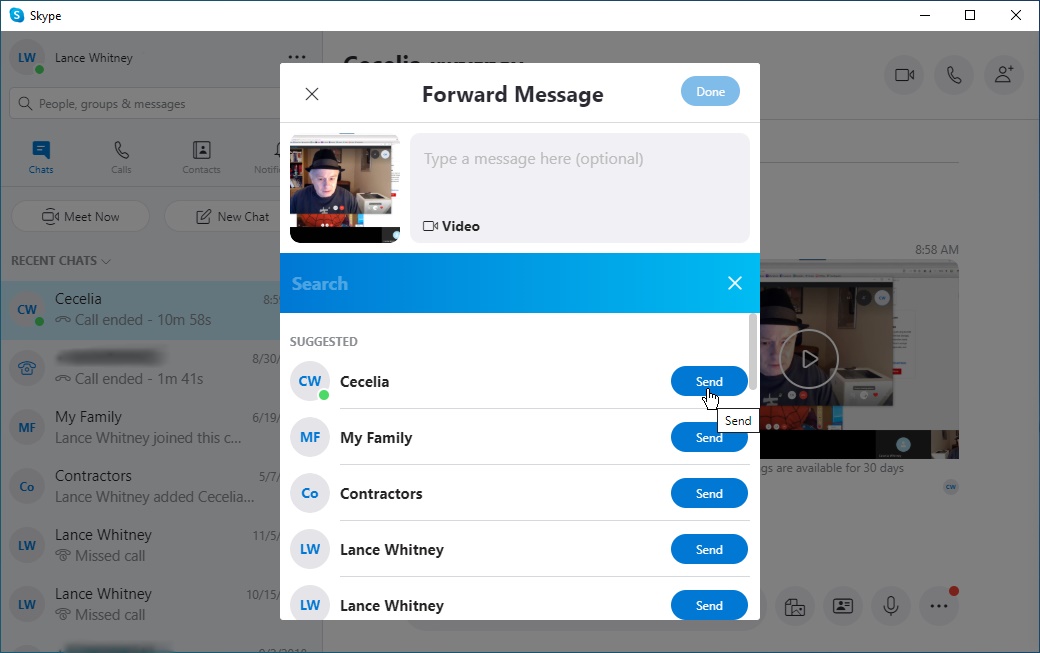
You can share the recording with another person by clicking the three-dot menu next to the video thumbnail and selecting Forward. If you wish to share multiple recordings at once, first click the Select Messages option in the menu. You then check the boxes next to all the videos you want to share and select Forward. A contacts page will open where you can select recording recipients from your list of contacts.
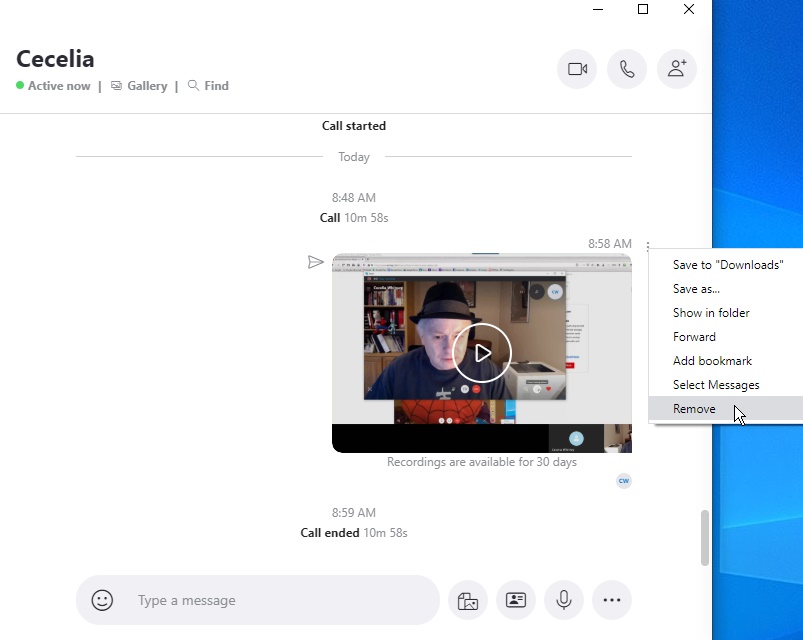
If you want to delete a recording, find it in the chat, click on the three-dot menu, and click the Remove option. You can delete multiple recordings at once by first choosing the Select Messages option. Check the boxes next to all the videos you want to delete, then hit Delete from the menu.
With the mobile Skype app, open the chat with the recording and hard-press on the thumbnail. You can now save the recording to your photo library, forward it to a Skype contact, or remove the recording entirely. Tap Select Messages to grab multiple recordings for forwarding or removal in one swoop.
CREDIT VIA HERE